How To Pressure Can Pinto Beans
This article is going to discuss how easy it is to pressure can pinto beans. If you are wanting to step into the world of food preservation, specifically pressure canning, but are a little timid this is the article for you!
Preserving food can feel overwhelming. You have heard ALL the stories. Your neighbors twice removed cousin’s friend’s grandma died because her pressure canner blew up. Or your mom knew this mail carrier who had a friend who had a friend whose mom killed her whole family on accident because of botulism.
Stories like these tend to debilitate our forward moving momentum into the world of food preservation. But I am here to tell you 9 times out of 10 those stores aren’t real. And we have come such a long way with the manufacturing of equipment that we can feel confident our pressure canners are not going to explode.
Table of Contents
- Why Start With Pinto Beans?
- FAQ
- To Salt or Not To Salt
- How To Prepare Your Beans For Pressure Canning
- How To Pressure Can Pinto Beans
- Step 1
- Step 2: Following Day
- Step 3
- Step 4
- Step 5
- Step 6
- Step 7
- Step 8
- Step 9
Why Start With Pinto Beans?
If you have never pressure canned anything and are dying to but are too overwhelmed and intimidated, I highly suggest you start with an easy food like pinto beans. You cannot really go wrong here, as long as you soak your beans ahead of time. There are only a few steps to successfully canning pinto beans and who doesn’t like a pantry stocked full of beans?!
This article is specific to pinto beans however, you can take these steps, concepts and process and pressure can any dried bean.
FAQ
Can I use a water bath canner to can dried beans?
To Salt or Not To Salt
This is purely on preference. Adding salt or not does not compromise the safety of the canning process. It is purely for taste. Sometimes I am on top of my stuff and remember to add salt, sometimes I don’t and just add it when cooking.
For quart jars 1 tsp is suggested.
For pint jars 1/2 tsp is suggested.
How To Prepare Your Beans For Pressure Canning


Preparation is minimal for pressure canning beans. I am all about keeping things simple. Working full-time and running a homestead, there is no time for complicating things. There are so many methods out there for pressure canning dried beans. If you find one that tickles your fancy, by all means. Please be sure that you are following a TESTED and APPROVED method though.
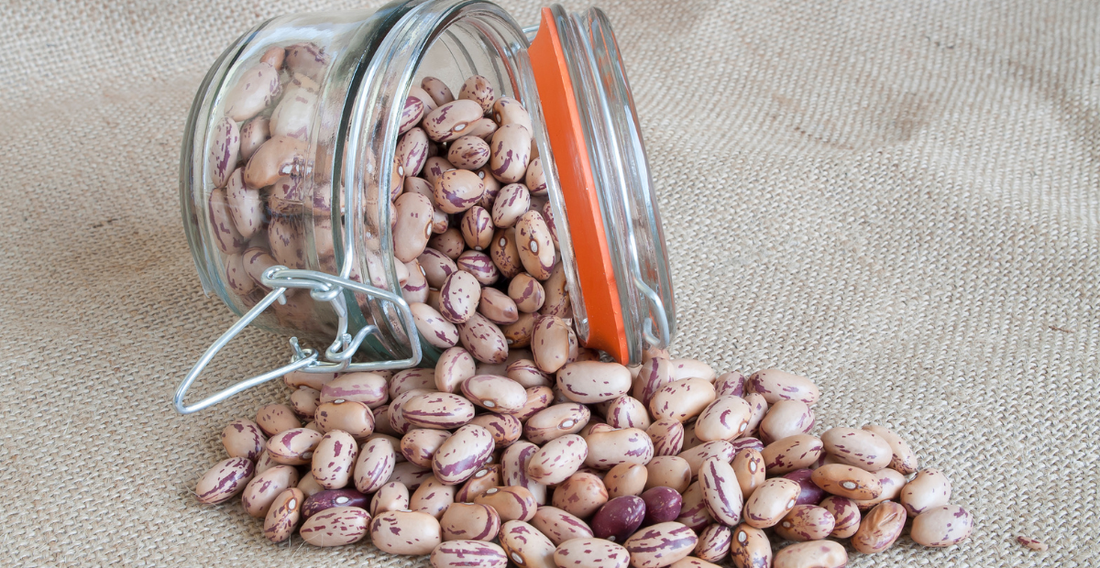
The night before you are planning on pressure canning, fill your jars with the dry beans.
For quart jars 1 1/2 cup of beans.
For pint jars 3/4 cup of beans.
Pour FILTERED water over beans, cover with a towel and allow to soak over night. In the morning your beans will have expanded and soaked in most of the water. Which is why using FILTERED water is so important.


Let’s now dive into all the steps of pressure canning pinto beans.
How To Pressure Can Pinto Beans
Step 1
Prepare your beans the night before you plan on pressure canning using the steps outlined above. I also like to prepare all my equipment, tools and books I need for my canning session. While I am able to pressure can beans in my sleep at this point, I NEVER start any canning session without busting out a trusted book to keep me honest.
One of my main go to books is from Melissa K. Norris, Everything Worth Preserving. Melissa does an incredible job at keeping things simple, to the point and utilizes trusted resources when it comes to food preservation.
Step 2: Following Day
Prepare your pressure canner. I prefer and will stand by my All American Pressure Canner. There are so many different pressure canners out there but this one will last a life time. To learn more about why I use this brand head over here to read this post.
Fill pressure canner with 2-3 inches of water and begin to heat.
Step 3
In a large stock pot bring to a boil about a gallon of water. I find a gallon will fill about 10 quart jars. Take it or leave it!
Step 4
Drain out the residual water that is left in each mason jar from the previous night. I found that if you just place a mesh strainer over the mouth of the jar and tip it upside down, the water drains easily and the beans stay inside the jar.
Step 5
Once your beans are drained, your pot of water is boiling and your pressure canner is heated you are ready to rock! Go ahead and add your salt if you choose at this point.
You are going to work with one jar at a time in this next step. This will prevent jars from cooling down and potentially going into thermal shock once you put them in the hot canner.
Using your canning funnel, using clean jars, ladle the boiling water over your beans and fill your jar leaving an 1 inch for headspace.
***Important note- Headspace is CRUCIAL. Headspace provides adequate room for food to expand while allowing air to escape, to then properly seal.
Step 6
Remove all air bubbles from jar and double check your headspace adding more water if needed.
Wipe the rim of your jar with a paper towel dipped in vinegar, place your lid on, place your ring on and tighten only finger tight.
***Important note- Tightening jars only finger tight is again, crucial. If you over tighten the rings on your lids, air will not be able to be siphoned out which is what creates the ability to seal your jar.
Place your jar into the pressure canner while you continue on with the rest of your jars.
Step 7
Once you have filled all your jars, place the pressure canner lid on making sure to tighten all locking bolts. Allow your pressure canner to vent for a full 10 minutes. Once you hear a steady stream of air coming out of the venting hole, that is when you start your 10 minute timer.
***Important note- Allowing your pressure canner to vent is….you guessed it….CRUCIAL! This part of the process is expelling all the air out of your canner, making room for only steam to fill the canner. Timing it for 10 minutes ensures all air is expelled.
Step 8
Once your 10 minute timer goes off, place your weight using the proper amount of pounds needed for your altitude.

Once your pressure canner comes to pressure and sits at that pressure for at least 5 minutes, that is when you can start your processing timer.
Process quart jars 90 minutes
Process pint jars 75 minutes
***Important note- If you happen to mix quart jars and pint jars together in your canner you need to process all jars at 90 minutes.

Step 9
Once your timer is done, turn off heat and allow your pressure canner to drop down completely to zero before opening your canner.
***Important note- DO NOT ever try to reduce the heat/pressure of your canner by putting a wet or cool towel on it. This will compromise the safety of the entire process.
Remove jars from canner and place on a towel somewhere, where they can be left for a full 24 hours before storing.
You may have to clean your jars, simply wipe down with a clean wet cloth allow to dry and don’t forget to remove the ring on your lid and label with contents and date!
See, how easy was that!

How to Pressure Can Pinto Beans
Pressure canning pinto beans is a super simple process easy enough for a beginner. It is IMPORTANT to read all the IMPORTANT notes called out in the detailed post above to ensure you are safely canning your beans. Please read post in its entirety if this is your first time pressure canning before moving forward.
Yield: 6 jars
Equipment
-
1 Pressure Canner
-
Set of canning utensils
-
Mason jars
-
Canning lids
-
Canning rings
Materials
- Dried Beans
- Salt
- Filtered Water
Instructions
-
Prepare your beans the night before by adding in 3/4 cup of dried beans to a pint size jar or 1 1/2 cups of beans to a quart size jar. Then pour filtered water over beans until fully covered. Cover with a towel and allow to soak over night.
-
Next day, prepare your pressure canner by heating 2-3 inches of water.
-
In a large pot bring to a boil filtered water.
-
Drain out the residual water that is left in each mason jar from the previous night. I found that if you just place a mesh strainer over the mouth of the jar and tip it upside down, the water drains easily and the beans stay inside the jar.
-
Once your beans are drained, your pot of water is boiling and your pressure canner is heated you are ready to rock! Go ahead and add your salt if you choose at this point.Working one jar at a time using your canning funnel, ladle the boiling water over your beans and fill your jar leaving an inch for headspace.
-
Remove all air bubbles from jar and double check your headspace adding more water if needed.Wipe the rim of your jar with a paper towel dipped in vinegar, place your lid on, place your ring on and tighten only finger tight.Place your jar into the pressure canner while you continue on with the rest of your jars.
-
Once you have filled all your jars, place the pressure canner lid on making sure to tighten all locking bolts. Allow your pressure canner to vent for a full 10 minutes. Once you hear a steady stream of air coming out of the venting hole, that is when you start your 10 minute timer.
-
Once your 10 minute timer goes off, place your weight using the proper amount of pounds needed for your altitude.Refer to post above for pressure canning chart.Once your pressure canner comes to pressure and sits at that pressure for at least 5 minutes, that is when you can start your processing timer.Process quart jars 90 minutesProcess pint jars 75 minutes
-
Once your timer is done, turn off heat and allow your pressure canner to drop down completely to zero before opening your canner.Remove jars from canner and place on a towel somewhere, where they can be left for a full 24 hours before storing.You may have to clean your jars, simply wipe down with a clean wet cloth allow to dry and don't forget to remove the ring on your lid and label with contents and date!

The world of pressure canning is so easy and so fun! Putting up jars of food that you canned yourself is a satisfaction that is unexplainable. You have to experience it for yourself!
Now that you got pinto beans under your belt, try your hand at some strawberry jam!
Until next time…